3.29.2014

Adventure Under the Stars Night!

AH! I am SO excited about our 2nd Annual Adventure Under the Stars Night, and my 3rd Annual Spring Art Show! This huge event will take place April 10th so I'll get more pictures and information about the event up then. Until then here is my start on the show and promoting the event.


Tip #1: students come to your class room every day so advertise on your door or inside your classroom. GET THEM EXCITED!!
 
 I did a panoramic view and no my sign does not have two i's in announcing but the panoramic made it seem that way ;) 
 
Tip #2: The BIGGER the BETTER... maybe not, but I sure think so.
Tip #3: COLOR
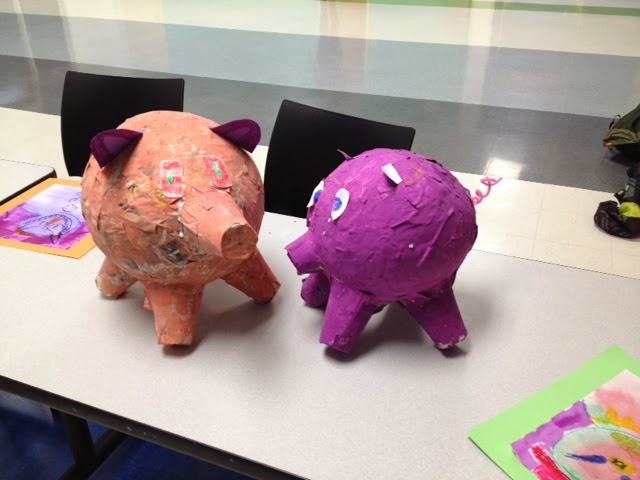
Tip #4: Adding something that is not flat but hanging or 3-D

My Favorite Gem- FEATURED ARTISTS!

It's your lucky day because I'm sharing my favorite art room GEM! 

THE FEATURED ARTISTS BOARD

I LOVE, LOVE, LOVE this board and my students do too. 


I am all about giving every student a chance to be an artist in the spotlight!

 I like the idea of an artist of the month, because it features great qualities your students hold. However, there will always be students who have those qualities but never get picked. I believe that factor shouldn't hinder their dreams of being a great artist. So instead I have the Featured Artist Board!

I created the Featured Artists board for many reasons. The three most important reason being: raising student self-esteem, encouragement, and of course art appreciation. I also use the Featured Artists board to help with classroom management. At the end of the class time I'll pick students who did a great job, or if there is time the students can nominate others they thought did well. My students can't wait for their turn to be Featured Artist, because of this I see many students go up and beyond my expectations. Don't get me wrong I expect students do well every art day, but this board is a little more motivation for them. It definitely gives them a sense of appreciation and accomplishment- a feeling that it is their time to shine! 

My FA board is right outside my room and the cafeteria. I love the location because if there is a extra 2 minutes left of class we can go look at the board- striking great conversations. It also gives students artwork to look at while they are waiting in line for their lunch. 

So how does the Featured Artists board work?
Let me explain!!

Materials Needed:

  • Butcher block paper
  • Fun boarders
  • FA sign 
  • Signs for each grade you teach
  • Laminated objects to put artwork on (I have picture frames cut out of construction paper)
  • 4"x 4" drawing papers
  • FA award to give students when it is their turn for FA
  • A little description you can attach to the award, or put on the award to tell parents what FA is
Understand, making this whole system is time consuming, but worth it. Just make it your own and it will be successful! If your not organized it's going to be more of a pain than something fun and exciting for the kids. When I came up with this idea it was my first year of teaching. I had so much on my plate and as a result I never got the FA system that organized. Instead I just jumped into it, and it ended up being more of a hassle. Since I wasn't as organized as I should have been some students never got the chance to be FA. I made sure to change that for my second year of teaching. Below are some steps to help explain the system and how to set it up!

How does FA board works:
  • First make your FA board.
    • Put up butcher block paper as a background for each grade you teach.
    • Give it some pizazz! Put up fun boarders- something to give it more attention.
    • Make a FA sign and put it above the board. 
    • Make signs for each grade level.
    • Get objects to put artwork on- something that gives individuality to each students work! It should make the artwork look like it is really special! 
      • Last year I used paint buckets
      • This year I am using unique picture frames that I cut out of construction paper. 
    • Laminate the objects and put them up on the board!
      • I have two objects per class since I pick 2 FA each FA week in each class.This gives me 10 frames per grade or section on the board.
  • Design a FA award to give students
    • Include a spot to write their name and class.
    • This year I designed a drawing on a paper copied it to card stock or heavy paper. 
    • I do this at the beginning of the year an copy enough to last the whole year! That way I have everything I need and don't have to worry about it later. 
  • Type up a little paper explaining FA to parents. Make it a big deal!
    • This could be done on the back of the award, otherwise I print out little paper and attach it to the student's award.
  • Pre-cut LOTS of 4"x 4" pieces of paper.
    • I cut all of mine for the whole year at once. Its nice because I don't have to worry about it later.... 565 papers later.
  • Attach the award, information paper, and drawing paper together. 
    • This way you can just fill out the award and hand it to the students. 
  • Decide how you are going to choose your Fa's, how often, how many, how long they will be up, and what happens if Fa's bring their artwork in late or not at all.
    • I choose Fa's every-other-week.
    • I choose 2 Fa's per class. One girl and one boy, but some weeks might be 2 girls or 2 boys.
    • My Fa's are up for 2 weeks
    • If a FA forgets to bring their artwork in and instead they bring it in a month later, than I still put it up... there are typically open spots and if not I wait until there is one. 
  • Keep a log of who has been FA. I know! It sounds like so much work, but it doesn't have to be. Record it in a seating chart. If you don't students are pretty honest if they have been FA or not.

The Process:
  • On a FA day clean up a little more early.
  • The Fa's are chosen.
  • Fill out an award for those FA and remind them what it is. 
    • I tell my students all about the FA board at the beginning of the year.
  • Fa's take home their award, and on the drawing paper they create an artwork.
  • Fa's bring their artwork back to school
    • I give my students a week
    • I like to give my Fa's a little prize for bringing back their artwork- a thank you from me! This year they get to pick a small eraser: star, heart, fish...
  • Hang up the students artwork 
  • Take artwork down and return to students
    • I have a bin of FA artwork that is ready to go home. 
      • When students have a chance they can find theirs.
  • I have 3 weeks open at the end of the year with no Fa's so the last 2 weeks I give those who did not chose to bring a FA artwork in another opportunity.

Other things about FA: 

  • In the past I've had  Popsicle sticks with numbers. Each student had a number and if they were doing their job they could put their number in the FA jar. That was the jar I drew from for the next FA. However, what do you do when you have a student who gets their number in the jar, but then has a behavior issue? I am so against taking away privileges students earn. When students earn something they deserve to keep it, and not have it taken away. At the same time I don't think they deserve FA. That's why I made the changes to what I do now. 
  • In the past I've also only had one FA per class and they were only up for 1 week. It worked well but students were so anxious for their turn. It was also time consuming doing this every week.
  • So what happens when someone has a great day, but they have already been FA? Just let them know! I created this to give every student a chance in the spot light. 

So there you go! One of my favorites! Time consuming to begin with, but so worth it!


Art Treasures

Art Treasures just make my day. If you were to walk into my class room you would find these treasures all over: covering my desk, my door, cabinets... and the kids love it!


One of the many joys working in an elementary school are treasures you get from the kids! If students are going to take the time to make me wonderful artworks why not show them off! 

I just got this treasure Friday. This student wanted to paint me something special so his grandma got him a canvas to paint on. Lets just say it really made my day... maybe even my week.

3.09.2014

Say Yum to Kendra's Delicious Banana Nut Bread

I am so excited!

I absolutely love making banana bread and trying different banana bread recipes. Today I made the best banana bread I have ever made! I seriously can't believe it because I love any kind of banana bread. This is a recipe I created with ingredients around the house, and its one to celebrate! 


Here have a piece!

Kendra's Delicious Banana Nut Bread
  • 1/2 c. coconut oil
  • 1 c. sugar
  • 2 eggs
  • 1 c. ground almonds
  • 1/4 c. ground flax seed
  • 1/2 c. flour
  • 1 tsp baking soda
  • 1/2 tsp sea salt
  • 1/2 c. sour cream
  • 1 tsp vanilla
  • 1/2 c. chopping walnuts
  • slivered almonds
  • pecans
  • chocolate chips
  1. Cream coconut oil and sugar
  2. Add eggs and mix well
  3. Grind almonds and flax seed into a floury substance
  4. Sift nut mixture, flour, soda, and salt and mix well
  5. Add bananas, sour cream, and vanilla- mix well
  6. Add walnuts and your preference of chocolate chips- I used 1/2 c. 
  7. Pour into your preference of pan- I used a large
  8. Top with pecans and slivered almonds
  9. Bake at 350 for 1 hour- if a large pan OR for 20ish minutes if small pans or muffins
  10. ENJOY :) 


Second Grade Color Wheels!


So I have that problem where I have WAY to many lessons I want to teach during the school year, and it is not possible to get it all of them in. This year I decided to have second grade make and take a color wheel home to complete. It was a simple scavenger hunt where students had to find at least 5 objects of each color. Then they had to glue those objects onto their color wheel and bring it back into school. I had a great turn out, but maybe 2-4 kids from each class forgot or didn't have the materials at home to complete the project. In that case they had time in class to finish. 


Paper Mache Pigs


Yep! We made paper mache pigs in 3D art class at the Y! Simple and messy!


Steps:

  1. Blow up a balloon
  2. Mix flour and water to the consistency of a thick paste
  3. Rip up strips of newspaper.... LOTS
  4. Taking one strip at a time- dip it in your paste and put it on the balloon
  5. Create a thick layer around your balloon
  6. Let dry 
  7. Add another layer of paper mache (optional- it will make your form stronger)
  8. Let dry
  9. Add on features like Styrofoam cups for the nose and legs- using masking tape
  10. Paint form
  11. Let dry
  12. Add eyes, ears, and a tail (we used paper and a pipe cleaner)

Glass Fusion Plates


Kyle and I finally picked up our glass plates! 

We took a glass fusion class at the Goddess of Glass in Minneapolis! If you enjoy being creative, new experiences, and bringing YOB you have to try out this class. This definitely made my list of "Great Adventures of the Twin Cities".

At first we didn't know what we were getting into. Google maps starting to take us right into the part of Minneapolis you don't quite want to be. However, Kyle is experienced living in the "hood" so I knew we could handle finding this Goddess of Glass place aka The Funky Bungalow. A few bumpy roads later we were in front of the most colorful, and most decorated house in the neighborhood.  Sounds about right for the Bungalow! Anyways, Connie Beckers is a MN glass artist who creates glass art and runs these fantastic glass classes. She is a kind heart with a passion for creativity and making her community a more colorful place. Her inspiring story of how she became a glass artist is enough to make anyone take a risk to achieve their dream. The night was full of laughs, stories, creativity, and fun. Kyle even enjoyed himself... even though he was the only guy there. 

Check out the link below for more Goddess of Glass!Logo The Goddess of Glass 


Here are the plates I made!